This manual provides a detailed instruction manual and best practices for using and operating the BumbleBee models 50, 100, 200 and 300 electrostatic dissipators.
Additionally, user friendly short videos describing how to use your BumbleBee are also available. Users are encouraged to watch these videos and refer to this operating instruction manual for a more in-depth explanation.
You may also find the “Comparison Chart“ helpful to understand the user benefits for each BumbleBee dissipator model.
1. Unpack your BumbleBee electrostatic dissipator and the AC-DC Power Adapter from the shipping box.
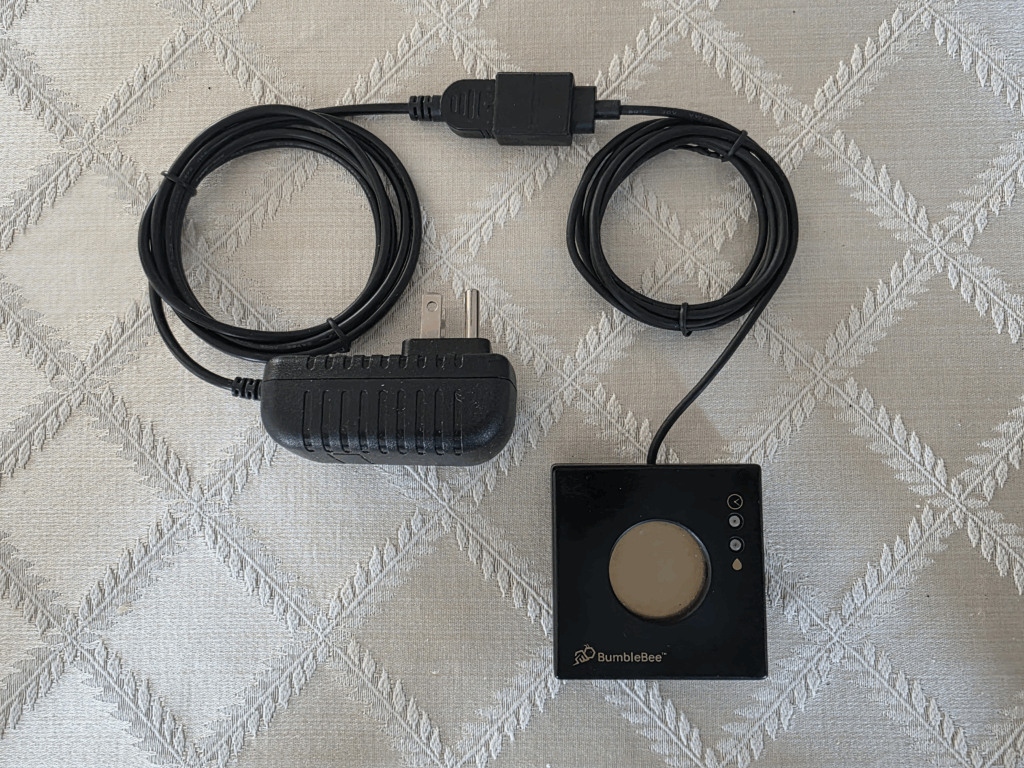
2. Plug-in the AC-DC adapter into a grounded 3 prong AC socket.
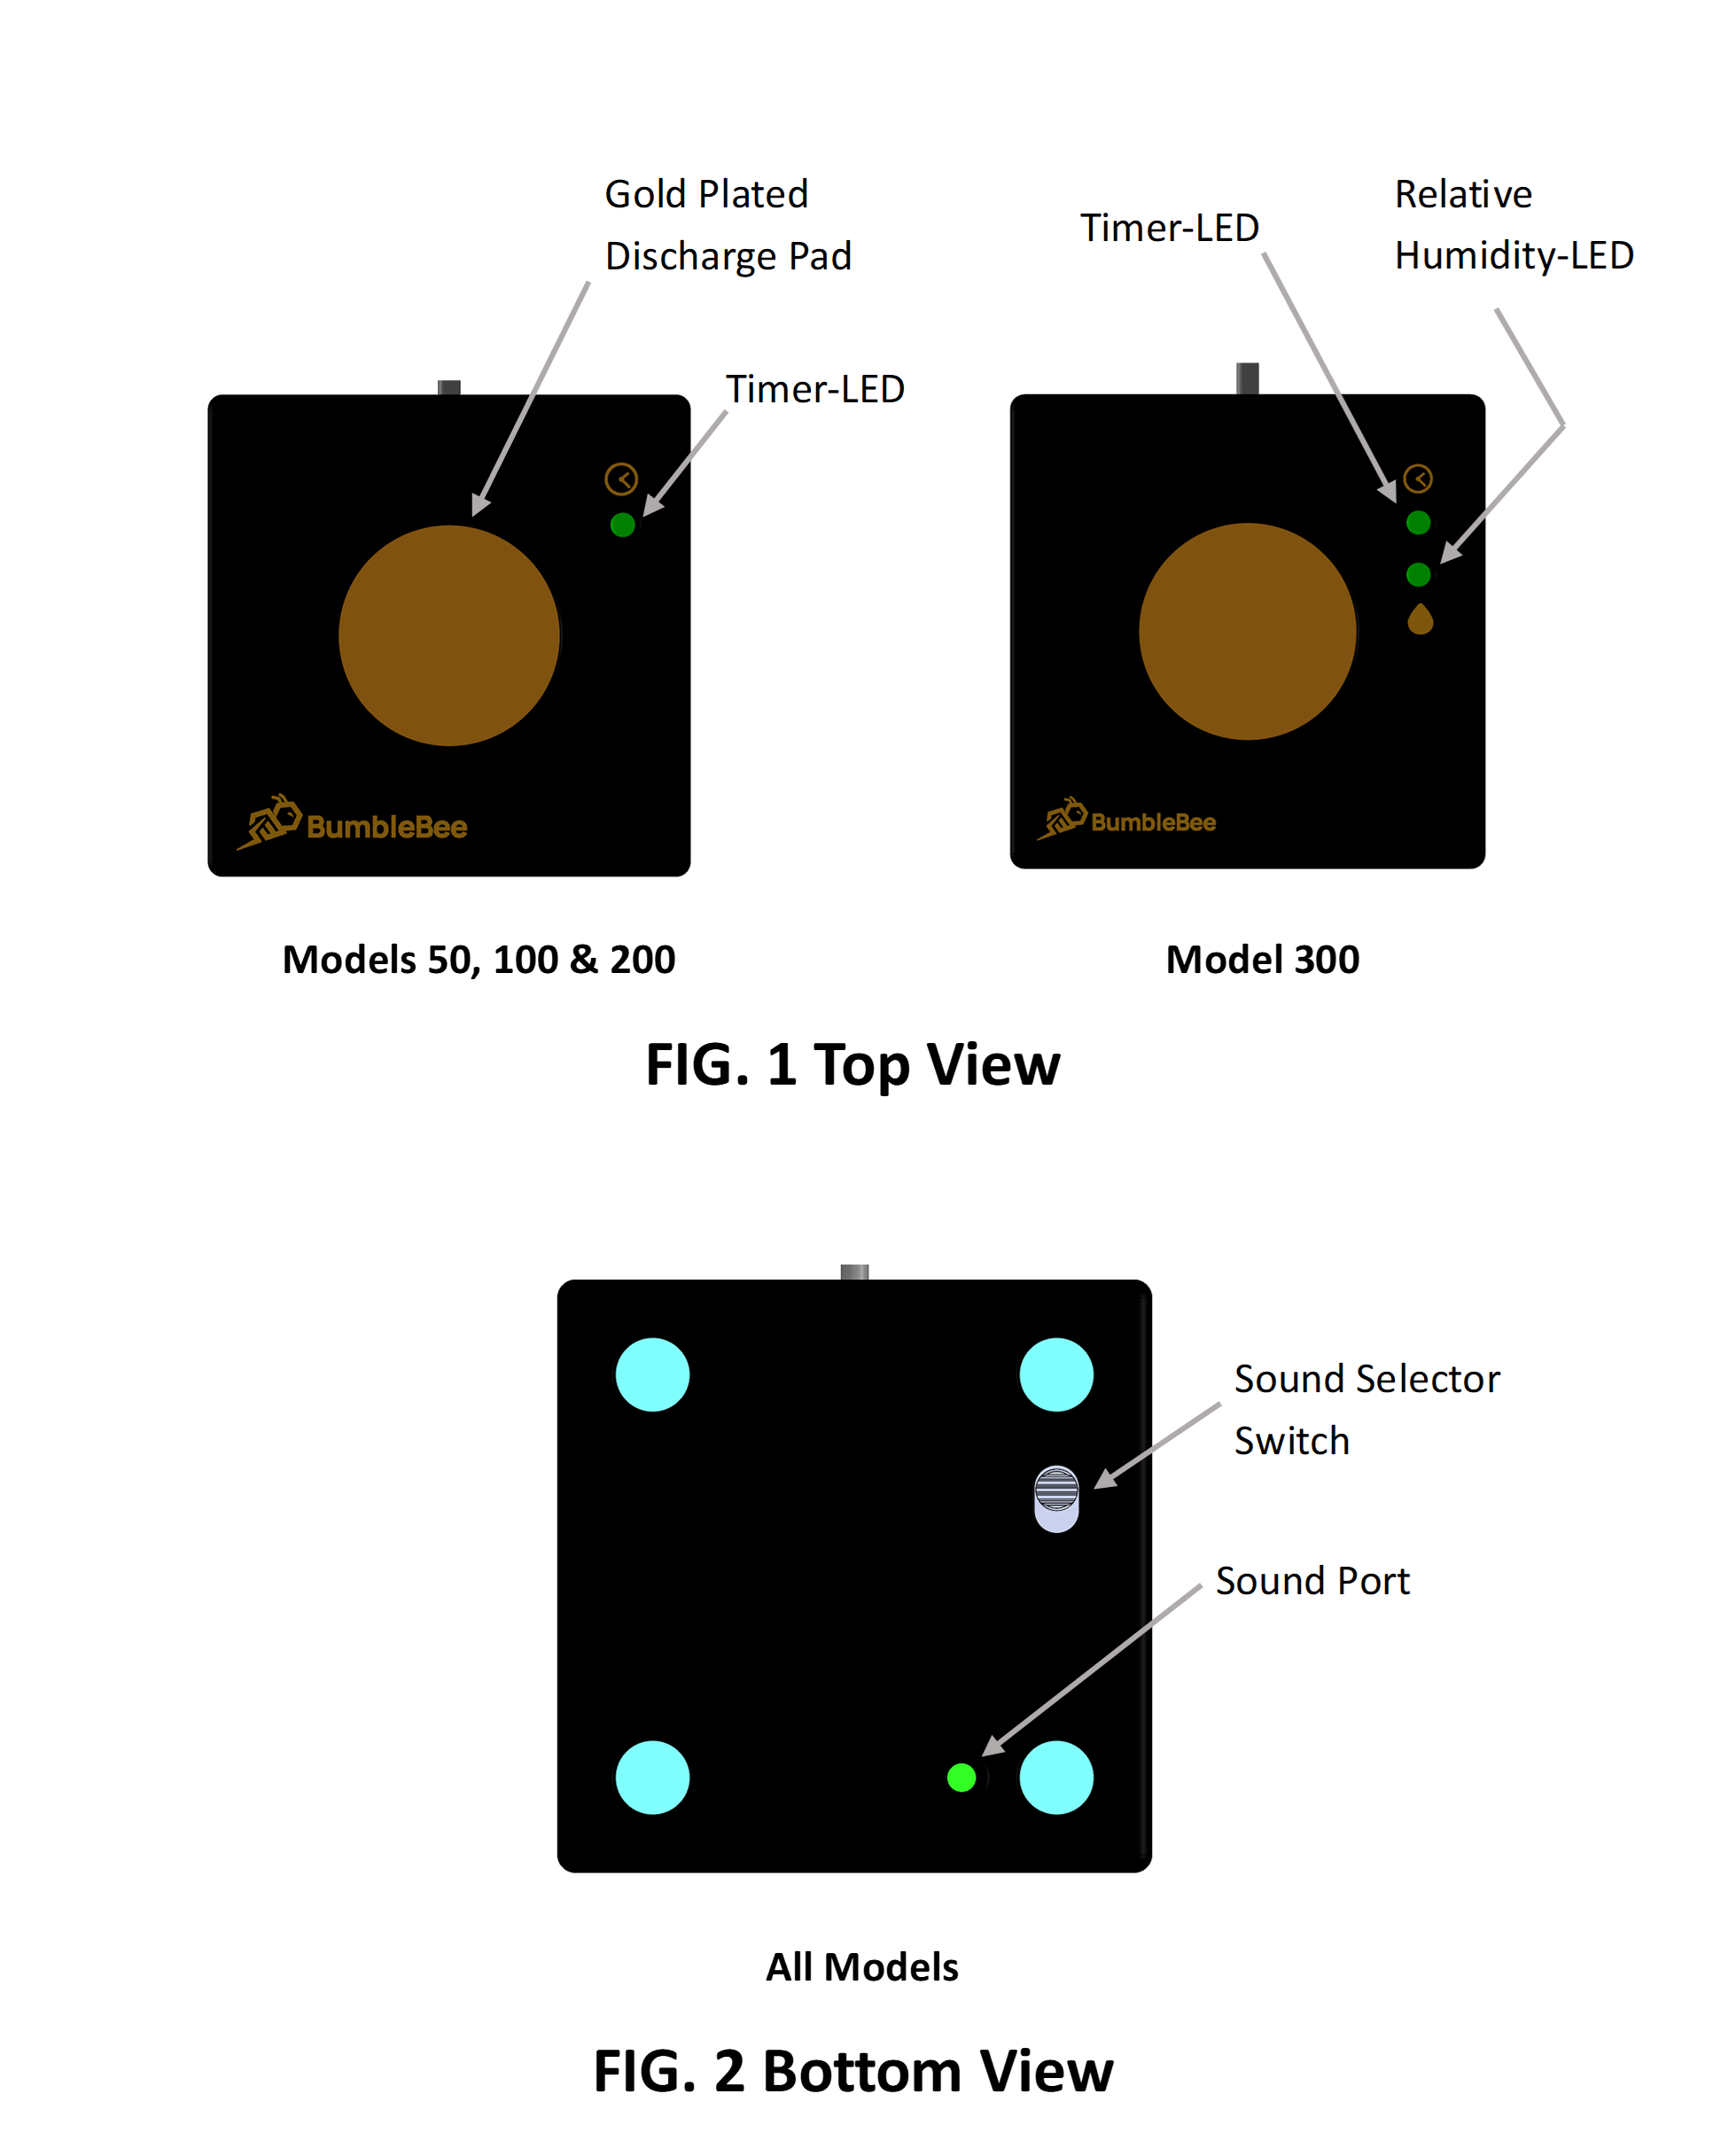
3. Review the top view (FIG. 1) and the bottom view (FIG. 2) of the dissipator models and become familiar with the location of all labelled elements.
4. Connect the USB plug from the dissipater into the USB receptacle from the AC-DC power adapter. Align the USB connectors using the connector symbols.
5. Immediately upon making a powered USB connection, all BumbleBee electrostatic dissipator models will initially proceed to sequentially illuminate the multicolor Timer-LED (first green, then amber and finally red) and sound a tone beep for each displayed color.
This informs the user that power and ground connections have been properly established to the BumbleBee. For the Model 300, the LED sequence is repeated for the Relative Humidity-LED.
Your BumbleBee electrostatic dissipator is now active and will safeguard your electronic devices from electrostatic discharge events.
Note: If the Timer-LED does not illuminate when the USB connection is made then the power and ground connections are not active and your BumbleBee will not provide static protection!
Watch this video: Setting Up Your BumbleBee Static Electricity Surge Protector.
Understanding How BumbleBee Works
Your patent-pending BumbleBee dissipater consists of an Electrostatic Dissipater and a Programmable Alert Timer shown below:
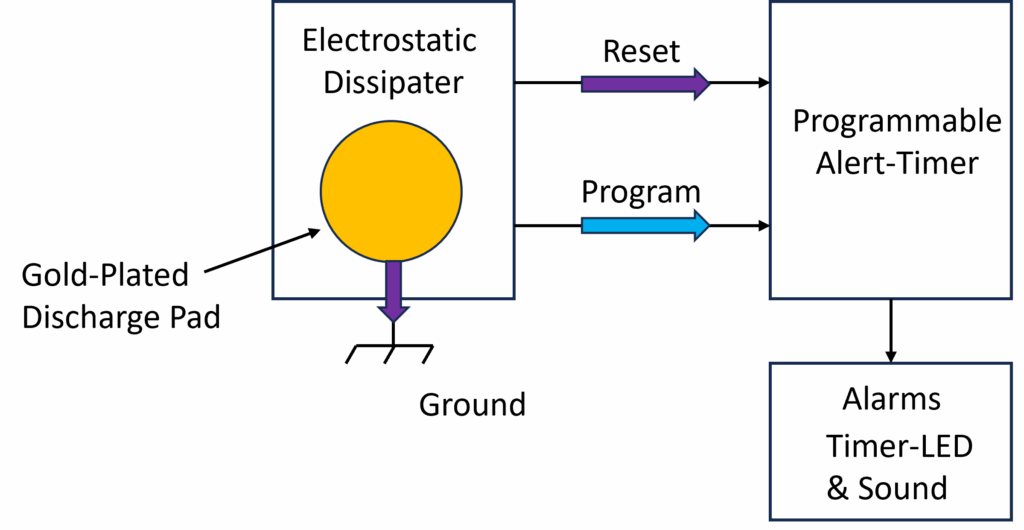
You will touch the gold-plated discharge pad to both controllably dissipate all static electricity from you to ground and also to reset the Alert Timer as shown by the respective purple arrows.
You will also use the discharge pad along with a finger touch pattern to program the Alert Timer’s alarm as shown by the respective blue arrow.
The Alert Timer will notify you when to discharge yourself during the alarm periods by blinking the Timer-LED along with a beeping sound (if the Sound Selector Switch is ON).
Discharging Yourself & Resetting the Alert Timer
As previously mentioned, touching the discharge pad will completely and controllably remove all static charge from you within 50 milliseconds AND with no static shock!
Touching the discharge pad also resets the Alert Timer.
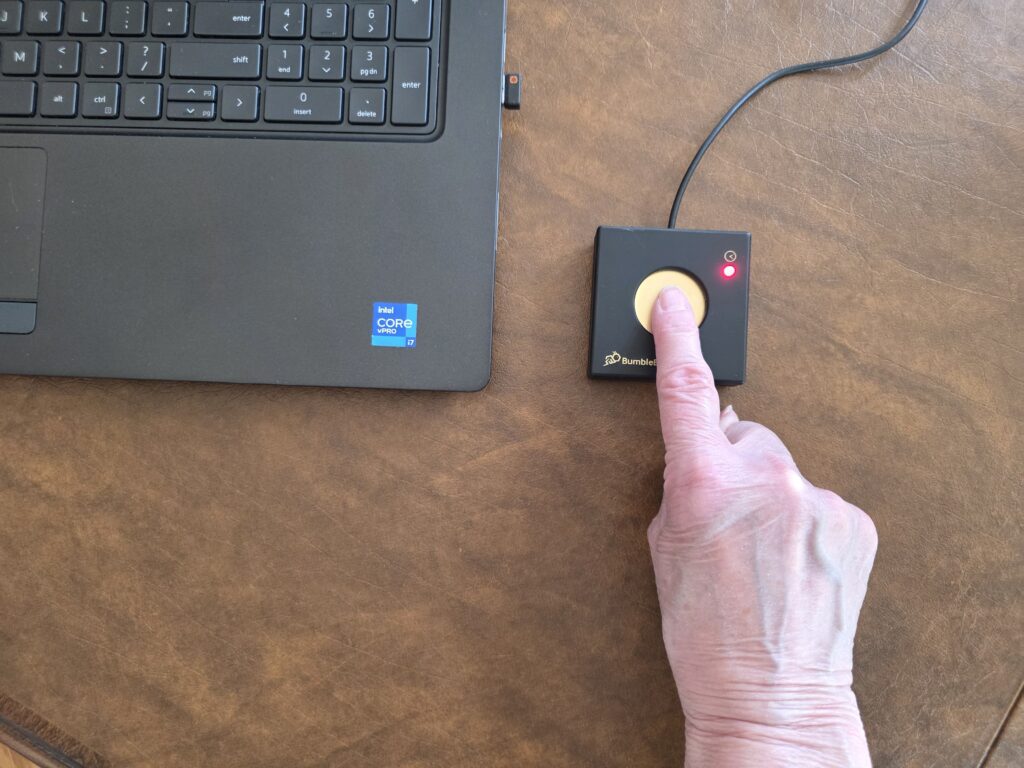
When you touch the discharge pad, the Timer-LED will blink red and a single short beep will sound (all models) as shown here. After the short beep, immediately remove your finger. The red blink and beep notifies you that the discharge is complete.
Watch this video: Discharging Yourself & Resetting BumbleBee’s Alert Timer
Understanding the Alert Timer
The purpose of the Alert Timer is to notify you when to discharge yourself and consists of three periods T1 (Normal), T2 (Cautionary Alarm) and T3 (Critical Alarm) shown here.

During the normal T1 period, the Timer-LED blinks green every 2 seconds and NO alarm beep is sounded.
At the end of the normal T1 period, the Alert Timer enters the cautionary T2 alarm period.
Within the cautionary T2 alarm period, the Timer-LED will now blink amber yellow every 2 seconds, and a single beep will sound (if enabled).
The cautionary T2 alarm period lasts for a fixed 1-minute interval and gently reminds the user to complete their immediate task and then discharge themselves. At the end of the cautionary alarm T2 period, the Alert Timer enters the critical T3 alarm period.
Within the critical T3 alarm period, the Timer-LED will now blink red every 2 seconds, and a double beep will sound (if enabled). The critical T3 alarm period notifies the user that an immediate discharge is required to maintain a safe ESD working environment.
The period colors represent the Timer-LED colors for the particular period.
The normal T1 period may assume a period default value set to 3 minutes (all models) or can be manually programmed by the user from 1 to 7-minute interval (models 100, 200, 300) or automatically programmed based upon the relative humidity (models 200 and 300).
Note: The recommended maximum T1 period is 7 minutes but can be programmed up to 60 minutes depending upon the user’s preference and office environment.
As previously mentioned, the cautionary T2 alarm period is fixed to one minute.
The critical T3 alarm period of the Alert Timer begins at the end of the cautionary T2 alarm period and continues until the user discharges themselves and resets the Alert Timer by touching the discharge pad.
At any time, the user can discharge themselves and reset the Alert Timer back to the beginning of the normal T1 period by touching the discharge pad.
Programming the Alert Timer’s Normal T1 Period
- Manually Setting the Alert Timer T1 Period to the Default Value of 3 Minutes (all models):
- place your finger on the discharge pad. You will hear the discharge beep and the Timer-LED will blink red, but do not lift your finger,
- maintain finger contact until you hear two short beeps,
- maintain finger contact until you hear one long beep,
- remove your finger.
- Manually Setting the Alert Timer T1 Period From 1 – 7 Minutes ( models 100, 200, 300):
- place your finger on the discharge pad. You will hear the discharge beep and the Timer-LED will blink red, but do not lift your finger,
- maintain finger contact until you hear two short beeps,
- release and touch the discharge pad for each minute you would like to add to the T1 time interval, each touch adds one minute to the T1 interval,
- remove your finger and wait for a long beep.
- Programming The T1 Period Based Upon the Relative Humidity (models 200 & 300):
- place your finger on the discharge pad. You will hear the discharge beep and the Timer-LED will blink red, but do not lift your finger,
- maintain finger contact until you hear two short beeps,
- remove your finger and wait for a long beep.
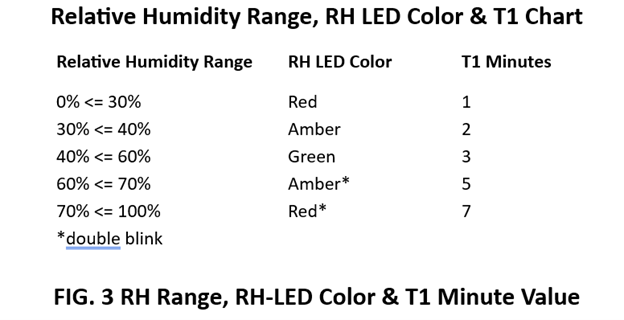
For the model 300, the RH-LED will immediately blink after the Timer-LED indicating a range for the ambient relative humidity according to FIG. 3 shown below.